For saving space and soil, this method also has several
other benefits, including no soil-borne diseases, no
weeds to pull and no soil to till, run-of-the-mill side
benefits of soil-less gardening.

Hydroponic Gardening Article

Hydroponics is basically a Greek word which associates the method of growing plants using nutrient solutions, without soil is known as hydroponics. Hydro means water and pono means labor.

Gardening

Does thinking of food laced with toxic pesticides and synthetic compounds kill your appetite? That's what industrial food production has brought to our tables - food that is hampering our health and creating havoc with the environment.

Gardening by Greenhouse

There are some plants that need extra heat, and the climate is just not right. For these occasions, greenhouse gardening is a great way to get what you need.

Flower Bulbs

Hydroponic is the technique of growing flowers, fruits or vegetables in a soilless environment. The practice originated from the Aztecs where they used rafts covered in soil from the lake bottom to plant vegetables

The Environmental

Apparently, we can see how nature is treated these days. It is a sad thing to know that people do not pay attention so much anymore to the environmental problems.

Greenhouse Calamities - Thoughts from a Novice Gardener

By Holly Masters

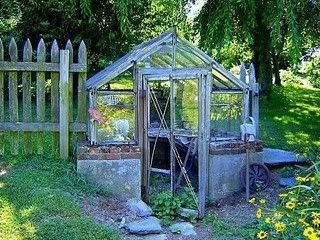
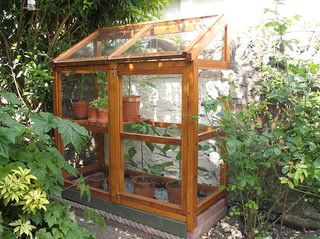
Greenhouses are a great addition to anyone’s garden. They come in all different sizes and you can nestle them right where you want them and with smaller versions of greenhouses you can move them quite easily. That said, as great as they look and of course smell, there should be some type of manual to buy when you are first setting up shop in there. There are many things no one bothers to tell you and if you don’t know, you don’t ask. Here are five things I learned by plodding along on my own:

  1. Never assume that your seeds are not growing and then buy plants instead. I started growing tomato seeds, in the proper seed tray, and within a month nothing had happened. However, I used pretty expensive potting soil and didn’t want to waste it so I dumped it on the floor of the greenhouse and turned it in. Then, I planted 6 tomato plants into the ground and had homemade salsa recipes salivating in my head. A month later I had well over 30 tomato plants tumbling over each other. The worst part was that I didn’t label the plants and wasn’t sure which ones to thin out. I thinned and ended up with the orange pixie variety mostly and they were about the size of a mutant cherry tomato.
  2. Never assume that just because your garden is now “indoors” that you won’t get an insect infestation. If you are afraid of insects, greenhouse gardening is not much better than being out in nature. After you plant your garden, whether in grow bags, on tables or directly in the ground, look up. There he is…Sammy the Slug peering down on you with a slight smirk on his face. If you are allergic to bee stings, every year at least one gets in your greenhouse and seems to twoddle around in there for what seems like an eternity.
  3. Never think you are a pack mule and can water your plants enough by using a gardening can or bucket. You can’t! With the heat and the sun shining through the glass the plants need more water than the outside plants. You need a mister, some type of irrigation system, ideally, and at bare minimum a hose. This means you’ll require a water source. Think about it when you are putting the greenhouse in place. If you’re water source is close to the house you must put the greenhouse within reach. Or, you can be like me… carry about 20 buckets of water out each night and only water ¼ of the plants before you give up. (That said, the cursing involved in the greenhouse creates more carbon dioxide and makes plants grow better).
  4. Always read or know the size to which your plants grow. Picture this…novice to gardening and new, proud-owner of a large greenhouse. “Oooh, what can I grow,” immediately pops into ones head. She plants dill, (accidentally) 30 tomato plants, eggplant and zucchini among other things. Everyday the novice goes out to water her plants and gets very excited. Until slowly, the greenery is a foot tall, then 2 feet tall then, well, then these plants are insanely out of control. Have you ever seen the size of a zucchini plant’s leaves…they are twice the size as your head! Zucchini sucks the life out of the plants planted underneath it and surrounding it. So, as for the garlic cloves planted…she was forced to make salsa sans garlic. On another note, the dill she planted grew to be at least 15 feet tall. A word to the wise, find out how big the stuff gets and plan accordingly.
  5. Never buy a greenhouse if you have no one to look after it while you are on your holidays. Greenhouse plants require a lot of work because generally the soil dry-out quicker. Therefore you must water everyday at least once. Irrigation systems can help with this, but it is still advisable to have someone check it regularly to ensure it works. I went on holidays for 2 weeks and yes I had a friend looking after the glassy greatness, but the following things happened:
  • She left the door open one night and some strange animal went on a frenzy hacking up all of the plants, probably eating a couple too.
  • She watered, but not enough water was used. Therefore, I lost a lot of plants including my favorite.
  • Leaving the door open also helped some of my plants get infested and it also created havoc with the internal temperatures.
  • Some of the tomato plants needed to be pinched out and after 2 weeks I had inferior, deformed tomatoes.
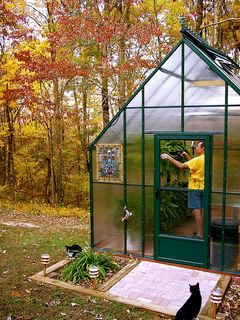
  • Cats. Cat pee in a damp, warm environment smells well, like cat pee.

Find Greenhouse at Outdoor Decor

There are many other kafuffles and calamities associated with this divine garden structure. There are many, many good things too. It is advisable to ask your friends, garden centers and online resources for advice before installing a greenhouse and planting plants inside. Now, that I have had my greenhouse for five years, I have trial and errored myself to plant-death and have a general idea about what is correct. After all, gardening is 90% trial and error and 10% knowledge.

CO2 for 'Free'

By David Oppenheimer

We’ve all heard that there is no such thing as a ‘free lunch’; well the process described in this article may be as close to one as you get. Most of us already know the benefits of CO2 enrichment for photosynthesis. To maximize indoor growing and greenhouse potential, CO2 is supplemented to maintain an approximate level of 1500 ppm, this can require frequent trips to an industrial gas supplier and/or a lot of propane or natural gas use, and related costs. It is ironic that many indoor farmers are exhausting CO2 to the outdoors from home heaters and hot water heaters while simultaneously releasing or generating CO2 for an indoor grow room or a greenhouse.

Propane and Natural gas burn clean enough that small non-vented gas devices have been approved for indoor use. These gas burning devices all use oxygen (in the air) to burn the gas, resulting in the by-products of CO2, H20 (humidity), and heat (Reusch). Exhaust from gas appliances can provide 3 essential conditions for maximized growth: humidity, temperature, and CO2 level. Most heat from the exhaust is removed by the heat exchanger of the furnace or water heater; resulting in mildly warm exhaust. Photosynthesis for many plants, including marijuana, in a CO2 enriched environment,is most efficient around 85 degrees F.

If a large gas heater’s exhaust is diverted into the grow area, there is great potential for all the oxygen to be burned up or displaced, as well as CO (carbon monoxide accumulation), resulting in toxic air conditions. With proper equipment, the CO2 from your gas furnace and/or water heater’s exhaust can be safely used to supplement the CO2 used in your grow room. This will save time and money, make the plants grow great, reduce fuel use, and dramatically reduce the amount of ‘Greenhouse’ gasses released into the environment. Using this technique, you will help prevent global warming while optimizing growing conditions. The key to doing this safely and effectively is to divert enough exhaust from your gas appliance into your grow area to maintain a CO2 level of 1500 ppm, and have additional exhaust directed outside.

“The Occupational Safety and Health Administration (OSHA) and the American Conference of Governmental Industrial Hygienists (ACGIH) have set workplace safety standards of 5,000 ppm” and very high CO2 levels can cause undetectable asphyxiation when O2 in the blood is replaced by the CO2 (Minnesota Department of Health). Keep a CO (carbon monoxide) detector in the grow room for safety in case equipment malfunctions! Do not attempt this project if you use oil or kerosene heat, which do not burn cleanly! The trick to tapping into this source of unused CO2 from gas furnace and water heaters is power dampers. A power damper is a duct section with a flap that opens and closes the flow through the duct and is powered by electricity. Some dampers close with current applied and others are designed to open. Most dampers are low voltage so the right size transformer must be wired inline to the damper; there are some 110volt dampers. Quality dampers will seal much better than cheap dampers. This simple addition to a CO2 enrichment system will pay for itself many times over (especially with today’s fuel prices) and reduce house or business emissions into the environment, making your project ‘greener’. It is necessary to have a CO2 levels monitor hooked to a controller (sequencer) to tell the dampers (by applying power) when CO2 is needed and when the threshold has been reached. You can still use your controller to run your CO2 generator and or regulator.

Find the exhaust pipe of your gas furnace or hot water heater. These devices should already be properly vented. Turn off your gas appliance while working on this. Disconnect (or cut open) a section of duct where it will be closest, with least bends, to tap in and route a new duct to the grow area. The few items needed can be found at most heating supply stores. If you can not find matching dampers for the size and type of duct that you have, you may have to convert the duct to a size or type that you can find dampers for. Using a “Y” connector and a power damper that closes when power is added, hook up inline with the duct running to the outside. For smooth flow, install “Y” so exhaust comes in the ‘bottom’ of the “Y” duct section. Now take the damper that opens when power is applied, attach it to the other “Y” opening. Run a duct from this ‘power open’ damper into the grow area above the plants, since CO2 is heavier than air; but you probably already know this. Now all you have to do is either wire the dampers together or use a multi-outlet adapter and plug them into your CO2 sequencer along with your CO2 generator or CO2 tank regulator using a 3 outlet adapter.

If the pipes are far from the outside wall or roof there may be inline duct booster fans. If the grow room is not getting flow through the new duct, a inline duct booster fan may be needed, especially if there is one used on the original duct that exhausts to the outside past the new “Y” section from the appliance. If you add a duct booster fan, wire it or plug it in together with the dampers, they will then power on and off together. Many furnaces will have an adequate exhaust blower so an additional duct booster fan will not be necessary. Keep an eye on any booster fans (if any) on the original duct between the “Y” junction and the outside, there is a chance they could overheat if running when the damper to the outside is closed. Once this is setup, when your CO2 sequencer determines it’s time to add CO2 to the room and switches power on, the exhaust damper to the outside will close and the damper to the grow room will open; resulting in the furnace’s or hot water heater’s exhaust being diverted into the grow room. The CO2 generator or release regulator will be working also, this way the room is guaranteed to always have just the right amount of CO2 even if the furnace or water heater is not currently in use. When the proper level is reached and the sequencer powers off, the damper leading into the grow room will close and the damper in the duct leading to the outside will reopen. All exhaust at this point will vent outside until the room needs more CO2. For safety, be sure all circuits and/or outlets are supplying no more than 80% of their rated load in watts, and are properly wired. Also, be sure to secure duct well. The 200°F rated duct tape holds up better than the regular (for connecting duct sections).

If you are diverting the hot water heater exhaust for this CO2 enrichment supplement, you can further take advantage of this setup by timing showers, dishes and laundry, as the lights come on (time that enrichment equipment runs the most) and during the light cycle in general.
Using this system, farmers will find they make less trips to get propane or CO2 tanks filled, and are spending less money, while the levels in the grow room remain the same.

This addition to an enrichment system will also reduce the volume of CO2 released into the environment from the house or business. The CO2 diverted to the room is used by the plants during photosynthesis, further reduces the gas appliance’s CO2 release into the environment. Using this system, the room will reach the desired CO2 level quicker, and fluctuate less, further enhancing growth.

Pest Control Tips for Maintaining Your Greenhouse

By Holly Masters

Greenhouses provide a warm, humid atmosphere and are home to a variety of different plants and flowers which is why they are a perfect target for insects. There are numerous types of insects which will want to live in your greenhouse and feed off of the wonderful plants and flowers which you have put so much time and effort into maintaining. The information below will provide you with tips and guidelines to follow in order to ensure you are doing everything in your power to ward off any unwanted pests.


Find Greenhouse at Outdoor Decor

The first step in learning how to prevent and eliminate insects from entering into your greenhouse is to understand and become familiar with the types of insects which are likely to reside there. The following is a list of the most common types of insects which you will likely find in your greenhouse:

  • Aphids
  • Fungus Gnats
  • Flies (many forms)
  • Bloodworms
  • Thrips
  • Caterpillars
  • Mites
  • Slugs and Snails
Now that you are aware of the different types of bugs and insects which may have taken up residence in your greenhouse, it’s time to learn how to prevent and/or eliminate them from remaining there.

Here are a number of things to keep in mind in order to ensure there are no bugs in your greenhouse:

  1. Always keep all doors, screens and windows shut when not being used for specific purposes.
  2. Inspect all new plants to ensure there are no bugs on them to begin with. Bugs have the ability to multiply quickly and can potentially cause a huge infestation in your greenhouse.
  3. Make sure there is no water lying around whether it is in jugs, cups or in a puddle on the floor. Insects are attracted to wet areas.
  4. Keep your greenhouse in good, clean condition. Not only do insects like water but they like to disguise themselves under areas of clutter. This also means keeping the lawn around your greenhouse mowed and neat at all times. Many pests reside in weeds, if you keep your lawn cut there will be no weeds for the insects to reside in.
  5. Bright colors such as yellow and red attract insects. Try not to wear or display (other than on the flowers themselves) any bright colors which may attract unwanted insects.

These guidelines will provide you with the basic knowledge you will need to ensure there are no unwanted insects in your greenhouse. Now you can relax and enjoy all the hard work which went into creating such an amazing atmosphere.

Bedding Plants and Plugs (small plants)

By Johnathan Sanders

It is not difficult to grow bedding plants from seeds, and you may be surprised to know you do not need to have a greenhouse or some hot room to grow them in. I have managed to grow my plants by placing them in an old carton/pot covered in a polythene bag. However, please remember to leave the pot where sunlight can get to it, i.e., a window ledge or a balcony.

In a previous article I have advised purchasing seedlings and bulbs from places like, a local fair or pound shop ( quite a phenomena here in the UK). Most magazine tend to have quite good offers on seedlings as well. Alternatively you can buy a young plant which means you do not have to incubate them like the seedlings.

Find Greenhouse at Outdoor Decor
Bedding plants are cheaper when bought in trays and can be bought from most garden centres and the like. Although, if you can afford it, it maybe worthwhile buying them in pots as they generally tend to grow better.

Alternatively you can buy young plants, called plugs, but please do check for obvious signs, such as leaves going yellow or mouldy.

Gardening can be cheap and fun as well and if done regularly, does not really need to take up a lot of time. A simple well kept lawn, surrounded by small flower beds, can make a big difference to your garden. Remember a lot of these items can be bought online for real cheap. Check out www.lawn-mower-parts.info, for further information.

Do remember to water your plants regularly, especially in hot weather.

Aluminium Conservatories

By Garry John

The conservatory is a popular addition to homes around the world and in particular in colder climates. Conservatories began their existence in the 1700s as Dutch farmers looked to find ways of protecting their plants during the colder winter months. These early greenhouse structures evolved not only into the common garden greenhouse but also the conservatories we see today. The original concept in all probability did not have in mind the idea of creating a transitional space between the dwelling and the out of doors. Of course the initial idea behind those who created the first versions of conservatories was to provide a means to prolong the life of plants during the chill of the northern European winter months.


Find Greenhouse at Outdoor Decor


Today the equivalent commercial greenhouses are typically made of aluminium, whilst the manufacture of aluminium has been slow to progress. However, in recent years as technology has progressed, aluminium conservatories have become a serious rival to the PVCu conservatories so popular since the 1970s. The New Generation Aluminium conservatory has a strong slim frame which lends itself perfectly to the sleek lines and rectangular design of Edwardian conservatories.

The modern aluminium can compete against the major strengths of its PVCu rival and indeed the finishes are so advanced these days the timber conservatories are also threatened. A major consideration is security and this is one area that aluminium comes out on top over PVCu. Aluminium frames do not need the large expansion gaps that PVCu frames have and which can be a weak point vulnerable to a would be intruder.

In the main, aluminium conservatories are versatile, strong and durable as an extension to the home. The increasing popularity has meant that in recent years it is much easier to find a capable supplier and builder that can readily construct a versatile and durable aluminium conservatory. By working with the most reliable people in the task of designing and building an aluminium conservatory, it is possible to create a spectacular addition to the home that will solidly stand the test of time. Although it could be argued that a conservatories looks it best when made of timber, there can be no doubt that the aluminium version is preferable to the PVCu conservatories that became so popular towards the end of the twentieth century.

Aluminium And Wooden Greenhouses

By Garry John

An important addition to any British back garden, greenhouses are firmly established in the British way of life. It's probably the inclement weather that drives the british gardener 'inside'. If you are visiting this site then you are probably thinking about obtaining a new greenhouse. It is possible you don't know the type of greenhouse you need or even how to decide on the type of greenhouse. Greenhouse design was revolutionised with the arrival of aluminium frames and the scarcity of pine. This article takes a brief look at the differences between metal and wooden greenhouses.

-- Wooden Greenhouses --

Wooden Greenhouses are the choice for the traditionalist and the expert gardener. They are commonly made from Canadian Western Red Cedar, which is renowned for it's exceptional long life outdoors as a result of it's effective rot resistance. Wooden greenhouses are the traditional style of greenhouse before the aluminium greenhouses and plastic greenhouses became more popular towards the end of the last century.


Select house plan

A timber greenhouse will obviously blend in naturally with your garden and will become an integral feature rather than something of an eyesore which you wish to hide away. Timber is also the choice of the expert gardener and it is generally agreed that it is the best material for a greenhouse. One of the main reasons is that the red cedar greenhouses are much better at maintaining a constant temperature than aluminium ones, which obviously leads to a healthier and more natural environment. An experienced gardener will know the benefit of having things to hand and a wooden frame will allow the gardener to easily fix hooks and shelves exactly where he wants them, so those all important greenhouse accessories are to hand. The wooden frame also makes it easier to fix an extra layer of insulation of plastic bubble sheeting, such severe weather conditions prevail.

The best time to add a protective coat to a timber frame is before winter sets in. Choose a good day in the late autumn and give the frame any attention it needs. Look for any wear and tear and treat it immediately. Most good timber frames come with a ten year gaurantee, but don't wait for 10 years before checking.

Wooden greenhouses are slightly more expensive than aluminium and plastic ones, but do offer more to the experienced gardener. Aluminium and plastic greenhouses are a better choice for the beginner before upgrading to a timber greenhouse.


-- Aluminium Greenhouses --

A major advantage of aluminium greenhouses is that they are relatively cheap and maintenance free. They are the best choice of greenhouse if your priority is low maintenance. However, you should be aware of the advantages of other types of greenhouse. For example, with wooden greenhouses it is easy to fix extra shelves and hookes, inside and out. Aluminium is certainly easier to maintain than a wooden greenhouse, but care should be taken to keep all structural components as clean as possible to deter pests and disease.Aluminium greenhouses are certainly the most popular at the moment and part of the attractiveness is the flat pack packaging and (relatively easy) self assembly. This helps keep the cost down and aluminium is the value for money choice of greenhouse.


Select house plan

Before erecting an aluminium greenhouse, there are certain considerations. Firstly you should decide upon the location of the greenhouse. Somewhere easily accessible during bad weather would be good. Observe areas of your garden during sunny days to see which parts get the most sunlight. Some protection from wind would be good, but not at the expense of blocking out light. Also, be aware of any stray footballs from next door !

If you're after a value for money and low maintenance greenhouse then aluminium is a good choice. You may lose some of the aesthetic qualities of a wooden greenhouse, but you do benefit from modern technology and design.

Greenhouse Buying Guide - Choosing The Right Greenhouse

By Mark Falco

When choosing a new greenhouse for your garden there are several things to bear in mind if you are going to get the most from your choice. A wrong decision can prove costly in the long run so be sure you know exactly what you need before you buy. Here are some of the most important things to consider:


Cool house Plan


What Do You Need Your Greenhouse For?

If you are looking to grow flowers or vegetables all year round then a tightly sealed, insulated greenhouse with good light transmition, ventilation and heating will be most desirable. However, if your greenhouse will only be used for germinating seedlings or wintering less hardy plants through light winters then a simple plastic frame with a polythene covering will no doubt suffice.

Free Standing or Attached?

Depending on your requirements there can be major benefits of either of these types of structures. An attached greenhouse can be a simple lean-to style greenhouse attached to the side of your house or a more expensive sunroom style construct in fitting with the rest of your building. The main advantage of either is in terms of maintenance and running costs as an attached greenhouse will benefit from being very simple to adapt to your existing lighting, heating and water sources. The major disadvantage here however is that being attached to your home means the greenhouse will have less direct exposure to the sun which may limit the types of plants you can grow effectively and positioning to minimise this is all important. A permit may also be required as this will be seen as a building extension to your home.

A free standing greenhouse on the other hand, offers many gardeners a much welcomed retreat away from the home, somewhere to escape the madness as it were. They are typically more expensive, requiring additional heating during the winter months and cooling during the hottest periods and you will also need to plan how to get electricity and a water to your new building. Your greenhouse will however have maximum exposure to sunlight.

What Size Greenhouse Do You Need?

Before you can begin thinking about anything else you need to know what size greenhouse you require. As a rule of thumb, whatever size you think you need right now is going to be too small for you a year later. Buy bigger than you need or you'll end up looking at a costly extension or a new greenhouse before long.

However, that doesn't mean you need to go overboard. If space is an issue then a lean-to greenhouse which attaches to the side of your house or other building might be the perfect solution. Equally, a mini greenhouse or a simple cold frame might cover your needs. Whichever size you choose, be sure to check out whether you need planning permission from your local authority before you put anything anywhere or you could be told to remove it later.

Which Frame Is Best?


Wooden, Metal or PVC? Experienced hobby greenhouse owners will tell you all about the benefits of a wooden frame. If you are building your own greenhouse then wood is also the easiest to work with. Wood is also a strong frame suitable for any covering you choose and if properly maintained will last a long time. The side benefit of wood comes about when you want to drive hooks in here and there to hang tools on or otherwise affix things to the frame. This is a simple hammer job with a wooden frame but a pain with an aluminium or galvanised steel frame. Wood does however need regular maintenance to protect against the humidity of the greenhouse environment and insects.

Aluminium, galvanised steel or other metal frame requires virtually no maintenance and is also strong enough to take any covering you choose. Metal frames do conduct heat and cold however and are therefore more difficult to heat and cool. Plastic frames can only be used with lightweight plastic sheet coverings and are usually only found in small structures likes portable and mini greenhouses.

Which Greenhouse Covering?

The four basic choices of covering you will find for a home greenhouse are the traditional glass panes, polycarbonate, fibreglass or polythene plastic sheeting. There really is no 'perfect' covering or construction material for a greenhouse, and what you choose will ultimately be as much reliant upon your budget as it is upon your requirements.

Plastic sheeting is cheap and the choice of commercial growers although probably not suited to the home user as it is less than attractive to look at, tears easily and typically needs replacing within 1 to 5 years.

For the hobbyist, the choice is most likely to be between a glass, fibreglass or polycarbonate cover. Glass is the traditional choice of greenhouse covering for hobbyists and of the three, allows the most unfiltered light to penetrate through and is the most attractive if your greenhouse is going to be a feature of your garden. It does however require a strong, sturdy frame and solid foundation and if your greenhouse is going to be placed near trees, around kids playing ball or in a particularly windy area or if you just happen to be a particularly clumsy gardener, can prove to be an expensive option. A glass greenhouse can also prove difficult to keep heated in the colder months and tough to keep cool in the summer months as glass is such a good conductor, heat and cold just pass through.

The major alternative to glass is polycarbonate. Polycarbonate sheets are lighter than glass and far less prone to breakage. Sunlight penetration through polycarbonate is less than achieved with a plain glass cover however, but as light diffuses through the sheets, plants are less likely to burn under strong sunlight. Single polycarbonate is as attractive as glass but the real value in polycarbonate comes from the double or triple thickness sheets which have an in-built air space between each sheet and can save a lot of money on heating costs.

Fiberglass is a lightweight solution which allows roughly the same amount of light to pass through as glass but is less aesthetically pleasing and is prone to staining over time.


Heating, Lighting & Ventilation

Depending on what you want your greenhouse for, you should consider the associated heating, lighting and ventilation requirements. For many, the requirements of their greenhouse is driven as much by their pocketbook as it is by any other requirements. The initial outlay is easy to see but hidden costs such as heating, lighting and cooling requirements are often overlooked. By chosing the right greenhouse in the first place you can often cut down on such costs - remember - glass and metal are conductors and are therefore harder to heat during the winter months which can prove costly if you are prone to long, cold periods. A lean-to greenhouse attached to the side of a building can, with a little bit of forethought, make use of that building's heating and lighting sources potentially saving money on both initial set-up and running costs.

Starting Seedlings Indoors

By Judy Williams

Unless you have access to a greenhouse, or something like it, those living in cooler climates will have to start seedlings indoors if they are to take full advantage of their growing season.
Here are some gardening tips to starting seedlings indoors.

You can use an enclosed porch, a garage, a shed or a basement. Make sure you have sufficient counterspace to work comfortably.


Hydroponics Guide

Growing seeds is pretty straightforward. Give them what they need (light, water, warmth) and they will sprout. Simple as that. But don't start them too soon! In 4-6 weeks they will be ready to go out into the garden. If you are still experiencing frosts, they will be killed.

Prepare your containers, whether they are trays, egg cartons, yoghurt containers or jiffy pots and make sure they have drainage holes. Your indoor seedlings are going to need a lot of light...more light than a regular plant, to get them going.

So arrange lights over your seedlings. Plan to have these lights on for up to 15 hours a day. Put a fan in the room on low to keep the air circulating too. This is surprisingly important. If the air is static the plants will not prosper.

Seeds need to be warm to germinate. They will be comfortable in a temperature between 60-70F during the day and will generally tolerate 50-60F overnight. Covering them with plastic or fabric or newspaper can assist in keeping them warm until they sprout.

Make sure your indoor seedlings are kept moist but not soggy. Once proper leaves appear (the first two are just seed leaves) feed them with a weak fish fertilizer mixed with water.

As the seedlings mature and near time to enter the garden proper, they need to be 'hardened off'. This means moving them outdoors for progressively longer periods each day. Start them off in a protected part of the garden and bring them back in at night. As they get stronger, they will be prepared to withstand the actual conditions in the garden much more successfully.

If you start your seedlings indoors, it will get you 'gardening' much sooner in the year and excite the old spring fever!

Positive Effects of Carbon Dioxide for Plant Growth

By Simon Fowler

Many articles have been written about the negative effects of carbon dioxide. Sick Building Syndrome, loss of concentration due to high levels of carbon dioxide, asphyxiation in breweries or wine cellars, all these things spring to mind when we hear the magic phrase carbon dioxide. Yet, perhaps today when Venus passes across the face of the Sun, we should remember that our original atmosphere consisted of nitrogen and carbon dioxide. Free oxygen is something that is not really chemically possible. Yet we have it as a result of plant life busily photosynthesising and converting carbon dioxide into oxygen during daylight hours. This is the original use of solar energy!


Hydroponics Guide

Plants require carbon dioxide to grow and why not help them by increasing the level of carbon dioxide? Normally, this is something that is undesirable, since carbon dioxide is the original greenhouse gas, as our neighbouring planet Venus can testify. But in a controlled, genuine greenhouse environment, there is no real reason why the level of carbon dioxide should not be enhanced in some way.

Indeed, tests have shown that increasing the level of carbon dioxide in a greenhouse to 550 ppm will accelerate plant growth by 30 - 40 %. The natural level of carbon dioxide in the atmosphere is around 450 ppm, having increased from about 250 ppm in the last ice-age, so this slight increase may not appear significant at first sight. The point of the matter is that the level of carbon dioxide in the average greenhouse with the ventilation system closed will drop sharply due to uptake by the plants and will lie around 150 - 200 ppm if nothing is done about it. In summer the ventilation system will be open and the fresh air circulation will augment the level to a useful degree. But what about those long, cold, dark northern winters? Most commercial greenhouses will have lighting and heating systems to encourage plant growth, but you still cannot open the ventilation and allow the cold outside air into your heated greenhouse without losing all the early crops. The only real solution is to augment the natural level of carbon dioxide in some way. Where it is used, the general rule of thumb is to augment by about 1000 ppm when the sun is shining (or all the lights are on!) and keep the level around 400 ppm during times of darkness. This will require monitoring, since there are so many variable factors involved and a simple control unit using an infrared sensor will be able to keep the concentration of gas constant at all times.

Rate of consumption varies with crop, light intensity, temperature, stage of crop development and nutrient level. An average consumption level is estimated to be between 0.12 - 0.24 kg/hr/100 m2 of greenhouse floor area. The higher rate reflects the typical usage for sunny days and a fully-grown crop. This equates to roughly 150 litres of carbon dioxide per hour.
There are many processes that naturally and unavoidably produce carbon dioxide:

Fermentation and combustion are two classic examples. In temperate zones it is necessary to heat a greenhouse (glasshouse is just another word for the same thing), and this heating will almost always involve the burning of fossil fuels, producing carbon dioxide. This leads to the natural urge to re-circulate the exhaust gas from the heating system into the greenhouse and so achieve a double advantage for the plants. This will require careful monitoring of the flue gas to ensure that there are at the most only traces of carbon monoxide being passed into the greenhouse. This is not only bad for the plants but also potentially lethal to the people working there! Such technology is available with gas monitors that will measure the carbon monoxide concentration continuously and have analogue outputs that can be used to regulate the burners or operate a trip to switch the unit off should problems occur.

The combination of breweries with greenhouse systems is also serious business in some areas. Generally, these methods are to be approved and should really be worthy of government support. Not only are they producing crops, they are removing a pollutant that would otherwise be vented into the atmosphere.

Monitoring of the added carbon dioxide is essential, however, since high concnetrations of carbon dioxide can lead to dizziness or even unconciousness of the personnel. Some plants will require higher levels of nutrients to compensate for some of the changes that occur. Particularly tomatoes and violets are sensitive to increased levels of carbon dioxide, hence the need for constant monitoring of the ambient concentration.

Wooden Greenhouses

By Garry John

An important addition to any British back garden, the greenhouse is firmly established in the British way of life. It's probably the inclement weather that drives the british gardener 'inside'. If you are visiting this site then you are probably thinking about obtaining a new greenhouse. It is possible you don't know the type of greenhouse you need or even how to decide on the type of greenhouse. This site has a series of articles on many of the different things to consider when installing a greenhouse.

For example, you need to decide on size, shape, style, location, installation, maintenance, irrigation, heating and this is before you have grown anything. You can look at the different benefits of aluminium greenhouses, pvc-u greenhouses and wooden greenhouses -- we have discussed each one seperately. You mat wish for a standard greenhouse or choose a bespoke model. There is a lot to look into - viewing manufacturers sites can help to get a feel for what is available. However, don't be put off as with a little research and planning the whole process can be made much easier.


Garden Supply

The benefits of a greenhouse would seem to be fairly obvious. They not only extend the growing season, but also allow you to grow more exotic plants. Even if you don't wish to recreate the 'Eden project' in your back garden, you can still be fairly ambitious with a very basic greenhouse. The downside may not be so apparent, but there is the constant battle against insects and disease. Also, the odd stray football to worry about. However, before too long you will be getting great enjoyment froim your greenhouse. Once in place a greenhouse makes a fantastic year round hobby and as each year goes by you will get more and more from your greenhouse.

Wooden Greenhouses are the choice for the traditionalist and the expert gardener. They are commonly made from Canadian Western Red Cedar, which is renowned for it's exceptional long life outdoors as a result of it's effective rot resistance. Wooden greenhouses are the traditional style of greenhouse before the aluminium greenhouses and plastic greenhouses became more popular towards the end of the last century.

A timber greenhouse will obviously blend in naturally with your garden and will become an integral feature rather than something of an eyesore which you wish to hide away. Timber is also the choice of the expert gardener and it is generally agreed that it is the best material for a greenhouse. One of the main reasons is that the red cedar greenhouses are much better at maintaining a constant temperature than aluminium ones, which obviously leads to a healthier and more natural environment. An experienced gardener will know the benefit of having things to hand and a wooden frame will allow the gardener to easily fix hooks and shelves exactly where he wants them, so those all important greenhouse accessories are to hand. The wooden frame also makes it easier to fix an extra layer of insulation of plastic bubble sheeting, such severe weather conditions prevail.


The best time to add a protective coat to a timber frame is before winter sets in. Choose a good day in the late autumn and give the frame any attention it needs. Look for any wear and tear and treat it immediately. Most good timber frames come with a ten year gaurantee, but don't wait for 10 years before checking.

Wooden greenhouses are slightly more expensive than aluminium and plastic ones, but do offer more to the experienced gardener. Aluminium and plastic greenhouses are a better choice for the beginner before upgrading to a timber greenhouse.

Hydroponic Greenhouse Gardening Is A Great Option For Growing Vegetables

By Percy Troughton

Why Hydroponic Greenhouse Gardening is Good for the Environment
Most tried and true organic gardeners have long looked upon hydroponic greenhouse gardening with disdain. This kind of gardening has long been considered by the purists to be a form of chemical agriculture. The thought of feeding tender young vegetable shoots a steady diet of chemicals was not what organic farmers had in mind. They were trying to get away from this type of farming practices, until a man named Steve Fox from Albuquerque, New Mexico came onto the hydroponic greenhouse gardening scene.


Hydroponic Book

Environmental Hydroponic Greenhouse Gardening

This type of gardening is a viable alternative to the destruction of once fertile soils using chemicals. The proposal is that hydroponic greenhouse gardening will produce greater yields and would free up the land once used for commercial farming into soil that could be refreshed and renewed for actual organic farming.

No longer would the chemicals that Big Food implements for the growing process poison the soil, it could all be contained by hydroponic greenhouse gardening. In a greenhouse atmosphere, chemicals considered dangerous would be used within a controlled environment. Gravel is used as the stabilizing material for the roots and stems of plants, so the only thing the chemicals would be spoiling is that same gravel.

You may be saying to yourself, “Now wait just a minute, I don’t want my family or myself to eat vegetables that have been grown in a chemical solution.” When you grow vegetables using hydroponic greenhouse gardening practices, the vegetables are not taking in any harmful chemicals, they are taking in a specialized chemical solution that is made to nourish them.

The Natural Alternative

Hydroponic greenhouse gardening is a way to feed the plant and not the soil. Conventional gardening methods also use chemical fertilizer to feed the plants, but it is not to theirs and the soil’s advantage, and that is why this method is beginning to fail. Soil can easily be depleted of its valuable nutrients when farming and growing practices fail to take into account the future of the land they are using.

Most big food growers incorporate methods that produce high yields of produce without thought to future generations. When growers use the hydroponic greenhouse gardening method, you can give the soil a chance to regenerate and replenish the minerals and nutrients it needs to be rich and fertile.

Before thinking of hydroponic greenhouse gardening in a negative light, find out the facts before you make any final decisions. You may find that the positive aspects of hydroponic greenhouse gardening far outweigh the negative. Do your research and find out more about how hydroponic greenhouse gardening can produce vegetables that are fresh, tasty, nutritious and good for the environment too.

Hydroponic Sea Oats

By Arian Osch

Hydroponic Sea Oats – How They Help the Florida Coastline
Sea oats, vital for preventing coastal erosion, have been raised in Allentown, Florida, which is more than thirty miles from the nearest beach and without a grain of sand. These sea oats are being grown hydroponically with their roots dangling in the nutrient-rich water. This method is applauded for saving energy. The sea oats have been grown in nurseries and transplanted to beaches, where they trap sand and help restore the dunes and have done so for over three decades. Hydroponic sea oats need less space and water and require fewer chemicals while generating no pesticide runoff. The process saves the energy it would normally take to make the chemicals and pesticides. With this process, there is also no need for tractors, which require a lot of fuel.


Hydroponic Book

Hydroponics date back over 5,000 years when the Egyptians made paper from papyrus grown in water. Thousands of hydroponic tomato growers went out of business in the 1950s, as they were unable to compete with low prices for conventionally grown varieties. By growing sea oats, the ecologically friendly cultivation method employs few resources and reaps tremendous results. Hydroponics is revolutionizing the way environmental managers repopulate Florida’s critical natural resources.

In the natural environment, one of every 10,000 sea oat seeds will germinate. When grown using hydroponics, one out of every 10 seeds will develop for transplantation to the beach as a mature plant. Hydroponics is often defined as the cultivation of plants in water. Research has since determined that many different aggregates or media will support plant growth so the definition of hydroponics has been broadened to read the cultivation of plants without soil. Growers all over the world are using hydroponic techniques due to the lack of a large water supply or fertile farmland. Home gardeners have used hydroponics on a smaller scale to grow fresh vegetables year round and to grow plants in smaller spaces. Greenhouses and nurseries grown their plants in a soil-less peat or bark based growing mix. The nutrients are then applied to the growing mix through the water supply. This is also a type of hydroponics.

Hydroponics is a technology for growing plants in nutrient solutions with or without the use of an artificial medium to provide mechanical support. Hydroponic systems are further categorized as open or closed. The definition of hydroponics has been confined to liquid systems only, which changes statistical data and leads to the underestimation of the extent of the technology and its economic implications. All hydroponic systems in temperate regions of the world are enclosed in greenhouse-type structures to provide temperature control, reduce evaporative water loss, and to reduce disease and pest infestations.

Hydroponics is a relatively new technology and has evolved rapidly since its inception over 70 years ago. It is a versatile technology and is appropriate for both developing countries and high tech space stations. Hydroponic technology can efficiently generate food crops from barren desert sand and desalinated ocean water. The economic prospects for controlled environmental agriculture and hydroponics may improve if governmental bodies determined there are politically desirable effects of hydroponics and those merits subsidizing for the good of the public. The benefits of this may include the conservation of water in regions in which it is scarce or food production in hostile environments.

Another desirable social effect could be the provision of income producing employment for disadvantaged segments of the population entrapped in economically depressed regions. Hydroponics has fast become a technical reality. Such production systems are producing horticultural crops where field grown fresh vegetables and ornamentals are unavailable for most of the year. The development and use of controlled environment agriculture and hydroponics have enhanced the economic well being of many communities throughout the world.

Lighting Considerations in Indoor Hydroponics

By Diana Johnson

Lighting is of crucial importance to plant growth and plays a key role in determining plant yields. Hydroponics growing equipment manufacturers have, therefore incorporated a wide range of lighting system designs to meet specific requirements of different plants that are grown in indoor grow rooms.

Lighting requirements vary, depending mainly on the plant type, the area over which the plants are grown and the proximity of the plant to the light source. The most important consideration is the lighting level that a particular plant needs for healthy growth. Some plants like houseplants and ferns do not require as much light as salads and culinary herbs while tomatoes, orchids and flowering plants require the maximum amount of lighting. It has been observed that indoor growers typically tend to under-illuminate their indoor grow rooms as they try to cover too large an area with the available light. They need to understand the importance of adequate lighting bearing in mind that a smaller area that is adequately lighted will produce better results than a larger one with inadequate lighting.


Hydroponic Supply

Fluorescent Lighting Fluorescent lamps are ideally suited for small scale salad and herb gardens and for the production of seedlings and cuttings. T-5 Fluorescent lights are suitable for slightly larger plants as the T-5 fluorescent bulbs are about equal in PAR value to a 400 watt Metal Halide light. These lights need to be kept close to the plants on all sides, but will grow fabulous plants with short internode distances as long as the plant are not too large. T-5’s are best suited for vegetative growth.

High Intensity Discharge Lighting Vegetables, flowers and several other plant varieties do best with all the light they can get and the modern HID lights provide just what they need. HID lighting has developed with improvements in lamp and reflector design from a piece of equipment for specific needs to an almost “plug and play” use for the lay person. HID lights come in two designs – with remote ballasts and as integrated ballasts. The remote ballast design has the advantage of only its lightweight reflector unit needing to be suspended from the ceiling; the integrated design requires the full unit including the heavy ballast to be suspended.
HID lighting comes in two basic types- Metal Halide and High Pressure Sodium. Metal Halide HID lighting produces a blue white light, and has been recognized as especially well suited for overall plant growth, while the High Pressure Sodium which produces a red/orange light is better suited to the flowering and fruiting period during which plants can more readily make use of it. Both types of HID lighting are in use with growers either alternating the two according to the plant growth cycle or mixing the two throughout the crop. However, the latest design of Sodium lamps which are now available in the “Agro” or “PLANTA” range can provide the light energy required during the entire cycle of plant growth and are being increasingly used by professional growers.

HID lights are available in wattage from 250 upto 1000 watts and beyond. The lamp which gives the maximum light output, watts used to lumens given is the 600 watt sodium lamp, producing 92,000 lumens.

Reflector While it is important to use the right lamps to generate the right amount and type of light, it is equally important to ensure that the light is directed in a manner that ensures minimal wastage. Reflector design plays and important role in maximizing light utilization; a well designed reflector can be as much as 30 % more effective than a poorly designed reflector in terms of its capacity to minimize light wastage. The most efficient reflectors now in the market feature designs generated using computer aided modeling techniques. These designs maximize light reflection onto the plants and enhance lamp life.

1. Light Movers
In addition to efficient light reflectors, rail systems that enable movement of lamp to ensure light exposure to the most remote plant go a long way in enhancing light utilization. A rail system called the Light Rail 3.5 has proved to be particularly effective in improving light utilization and should be considered by those who have a rectangular growing area. This is a simple device that uses a six foot rail with a precision engineered carrier that moves the light back and forth over the growing area. The Light Rail 3.5 system offers several advantages- it covers a greater area and ensures that all plants receive the same amount of light; it eliminates having the plants moved around for light exposure and it eliminates shadows thus ensuring uniform plant growth. It also affords closer exposure of plants to light without burning the foliage. There are other systems that move the light along a circular path, these are more suited to square grow rooms. Some systems also allow combination lighting with a Metal Halide Lamp on one arm and a High Pressure Sodium on the other, or 4 different ceramic bulbs on 4 separate arms, each giving a different color temperature. These 4 different bulbs combine to make one very full spectrum when mixed via a circular or rotating light mover.

2. Reflected Light
Reflective surfaces around the growing area can make a difference in the amount of light that plants will receive. Poor reflectivity of the surfaces around a plant will diminish the amount of light as the surfaces will absorb most of the incident light. It is not difficult to ensure highly reflecting surfaces around the plants in a grow room. Walls can be easily painted with flat white paint, which is an excellent reflector. If this is not possible the walls can be covered with black/white plastic film which can also be used for the floor. Polystyrene foam sheeting can also be used as it is a good reflecting surface. The most reflective floor covering is brilliant white vinyl. It is tough and hard and makes an ideal reflecting surface. Finally, there is MYLAR, the most reflective material that can reflect 92 % of the light it receives.

3. Timers
Automatic turning on and off of the lighting system requires the use of an efficient timer. Incorporating a timer in the lighting system ensures that the plants in the grow room are exposed to light for the “on” set time after which the lights are switched off for the “off” set time. The continuous uninterrupted repetition of this on/off cycle is essential; a reliable, good quality timer is therefore important. It is best to avoid ordinary non-grounded plug-in timers as these are prone to failures causing disruption of flowering cycles in certain plants and increased power bills.

Power Consumption
Power consumption is one of the factors that need to be considered while working the economics of the project. However, this should not ordinarily deter the beginner as the costs involved are surprisingly small. The beginner should work out the power requirement and its economics at the outset to avoid problems later.

Warning
Grow-rooms can be damp and humid. All electrical equipment, fittings and accessories should be carefully located to avoid any contact with water splashes. It is advisable to seek the help of a licensed electrician while installing the electrical system.

Hydroponic Techniques - Home Hydroponics

By Diana Johnson

Hydroponics was originally defined as “the cultivation of plants in water,” however, with the successful use of the technique for cultivating plants in air and other media besides water, the definition was changed to the more inclusive - “the cultivation of plants without soil.” Hydroponic techniques have proved effective for commercial cultivation and also in home gardening. Hydroponic techniques and systems have greatly benefited agriculture especially where, conventional soil cultivation is not possible due to unavailability of agricultural land, resources or other factors.


Hydroponic Supply

Hydroponic Systems & TechniquesThe science of hydroponics has evolved since its inception with the development of two main systems – the water based hydroponic systems and aggregate based hydroponic systems. Water based hydroponic systems use water around the plant roots for delivery of nutrients. In aggregate based systems, plant roots are supported in some kind of inert material such as rockwool, pebbles etc. Both Water Culture Hydroponic Systems and Aggregate based Hydroponic Systems may use one of several different techniques of nutrient delivery to plant roots depending on requirements particular to the system.
Water Culture SystemsWater culture systems use water for delivery of nutrients which can be delivered to plant roots in different ways. Several techniques can be used; some of the more common of these are -

Nutrient Film TechniqueIn nutrient film technique a plastic trough or tube is used as the container through which a thin film of nutrient solution is made to flow continuously. Plants are grown out of holes on the top of the tube with their roots in the trough. The thin film of nutrient flows constantly past the roots. The trough is positioned to slope gently in order to maintain the circulation of the nutrient solution through the nutrient reservoir, to the plant roots and back. This is a popular technique with the home gardener and comes in many variations.

Aeroponics makes use of a nutrient mist delivered to the roots by a vaporizer or some other means. An A shaped frame constructed out of Styrofoam boards forms the support-base for plants. The plants are placed in holes on the inclined sides of the frame with the roots reaching out through the holes. The nutrient mist sprayed inside the A frame which then settles on the roots from where it is absorbed by the plant. Excess nutrient runs down the frame, is collected and recycled.

The aeration method was one of the first hydroponic techniques to be developed. In this method plants are suspended 1 inch above a nutrient solution collected in a container. An aquarium air pump is used to bubble oxygen through the nutrient solution. The plants are carried in a 2-inch deep mesh tray that fits inside the container when the lip of the tray is placed over the container’s edge. Gravel, clay pebbles or vermiculite filled in the tray serves to hold the plants and at the same time allow the roots to grow down into the nutrient solution.


Hydroponic Supply

Aggregate SystemsAggregate systems use inert materials such as rockwool, clay pebbles, gravel, etc. to support plant roots. The inert media serves to support the plant and also allows good oxygen penetration to the roots in addition to retaining a thin film of nutrients and water.
The flood and drain method is the most commonly used aggregate system. In this system a container is filled with aggregate and plants which is then flooded with a nutrient solution. The solution is then drained back into the nutrient reservoir by opening a valve at the bottom of the container.

The roots should be submerged for not more than 20 -30 min. during each cycle.
Another widely used aggregate system is the trickle feed method. The nutrient solution is continuously pumped from a reservoir through a 1/2-inch irrigation tube. This tube branches into several 1/8-inch tubes that feed the solution to containers carrying the aggregate and plants. Solution that may be in excess gets collected at the base of each container and is then returned to the nutrient reservoir.

Tips on Making Your Own Hydroponics System

By Arian Osch

If you're going to build a hydroponics system, it's best to begin with a container to use as a reservoir. For homemade systems, it's best to use a fish tank or a similar object. Once you find a suitable reservoir, you must paint it black. The black pain will make your reservoir light proof, because if light enters the reservoir it will promote the growth of algae. It is also a good idea to score a line on your reservoir once it is painted (use a knife, and scratch off paint in a straight line from top to bottom), which allows you to monitor the amount of water in your reservoir. Some people may not have to score their reservoir if they use a floater (Styrofoam), which indicates the amount of water in the reservoir by sinking. However, the line will give a view of the nutrient solution level.


Hydroponic Supply

Styrofoam should be used in your homemade reservoir. Before installing the Styrofoam into your reservoir, you should use a tape measure to measure the reservoir, from inside of the reservoir from one end to the other. Once your reservoir is measured, cut the Styrofoam 1/4" smaller than the size of the reservoir. The Styrofoam should fit nicely into your reservoir, and have enough room to adjust to changing water levels. Making your own hydroponics system also requires you use net pots, and you should cut holes in the Styrofoam for the placing of the net pots. A hole should also be cut into one end of the Styrofoam to allow for the airline to run into the reservoir.

When creating your own hydroponics system, it is also important to consider how many plants you want to grow. The amount of plants grown should depend on the size of the garden you build and the types of crops grown. Plants should also be space appropriately so each plant receives a generous amount of light. It’s also important to choose a strong pump for your hydroponics system. A strong pump should be able to provide enough oxygen to sustain plants. It’s best to employ the help of a professional when choosing a pump from a hydroponics supply store. Giving the professionals information about the size of your reservoir should make it easier for them to make a recommendation.

After installing a pump attach an airline to the pump and attaching an air stone to the other end of the line. It’s important to make sure your airline is long enough to travel from the pump into the bottom of the reservoir. If the airline is not this long, then it should float in the middle so oxygen bubbles can get to the roots. The line should also be the right size of the pump you choose, and most pumps come with the right size airline. It’s advisable to use a one-gallon bottle to fill your reservoir, which allows you to figure the capacity of your reservoir.

Lighting is very important if you’re building a hydroponics system indoors. If the system is inside, you’ll have to provide artificial lighting for your plants to thrive. The size of the garden will determine how many light fixtures and how many watts will be needed to provide proper light. It’s a good idea to visit a lighting store, where you will be able to receive more information on lights to use for your system. When plants are in growth phase, they will need high intensity discharge lamps. When plants are in bloom, high-pressure sodium lights increase yields and will grow denser and heavier flowers. Using fluorescent lighting is also an option, but fluorescent lights don’t offer the same amount of lumens as the others. Fluorescent lights are better suited for starters and seedlings and for growers with ventilation problems. Fluorescent also burns cooler than other lights, which allows you to place your plant closer to the light source without damaging them.

The Use Of Indoor Gardening Sets To Get Started

By AnnMarier M

Gardening has been a passion with mankind for many reasons such as, growing vegetables and herbs for a healthy life, growing flowers and plants for a better environment and also engaging in a relaxing and rewarding practice that everyone will benefit in the end, you, your family and the world. Indoor gardening is a great concept because it brings a little peace of heaven in your house even in the cold months of winter when you cannot enjoy outdoor gardening anymore. Here is how you can get started and have a garden in matter of minutes with al inclusive indoor gardening sets.


The Different Types Of Indoor Gardening Sets
Indoor gardening sets are made for beginners and professionals and they usually contain of everything you will require to get started right away without the plants, herbs or flowers, which you will require to pick according to your own desire. There are a few types of indoor gardening sets and they are: organic, hydroponics, aeroponics and typical indoor gardening sets. Deciding on which type of indoor gardening sets should be easy if you consider what are you going to grow in your garden and how large you want it to be; organic indoor gardening sets are usually the most popular because it provides chemical free products and still provides you with the pleasure of gardening. Hydroponics and aeroponics indoor gardening sets are fully automated and will grow great quality plants, veggies or herbs but will require a bigger investment.
To shop for indoor gardening sets try local home improvement and gardening stores where professionals will be able to guide you to the type you require and get you started in the minimum amount of time.

Maintaining An Indoor Garden
People enjoy indoor gardens for many reasons but end up killing them because they treat it as outdoors gardens and that is a big mistake. Indoor gardens require humidity to live especially in winter when we have the heat turned up and the air in the house gets dry in the process; a humidifier will do the trick but remember to also keep an eye open not to create mold in your

house in the process.
Watering an indoor garden must be done moderately and only as per the requirements of the plants not forgetting however that their space is limited and drainage is not as good as outdoors soil; many people over water their plants causing them to die, try and feel the soil first by touching it before you water your indoor garden.

Growing Vegetables using No-Energy Hydroponics

By Dennis DeLaurier

If you are worried about the safety of the food you eat, then you just might be interested in growing your own vegetables using no-energy hydroponics. Hydroponics is a dirt free method of growing plants usually using an inert medium that holds the plant and a liquid nutrient. Most hydroponics systems use electricity to pump and feed the nutrient to the plant. Some of these systems recycle the nutrient and can be quite complex and expensive. No-energy hydroponics systems replace all that electrical energy with a little bit of human energy.

No-energy hydroponics is nothing new, and has been used for thousands of years. The author has used this type of system to grow just about any type of vegetable. Vegetables like green beans, lettuce, tomatoes and herbs do quite well. A no-energy system consists of plants placed in an inert medium and fed nutrients at intervals determined by examining the wetness of the medium, and the health of the plant. The authors favorite medium is coconut fiber placed in a large plastic food tray. Other types of containers can be made from wood frames and plastic that lines the bottom. The minimum depth of the tray should be around 4 inches or more. None of the trays should have holes for the nutrient to escape and is why so little energy is needed to keep the plants happy.

To create your own no-energy hydroponics system, you will need a good container, some seeds or plants and a good medium like coconut fiber. Additionally, you will need some hydroponics fertilizer. The coconut fiber and fertilizer can be found at a hydroponics store or ordered over the Internet. The author found his deep food tray at Sams. You might look for them at restaurant supply houses as well. Once you have everything, it will be time to mix up the coconut fiber and add it to your tray.

Fill your tray to the top with coconut fiber. If you are starting seeds, refer to the seed packet for seed depth. You will want to moisten the top layer of the coconut fiber with water and keep it moist until the seeds sprout. Once sprouted, you can start adding half strength nutrient until they get their first true leaves. Make sure that the tray gets a lot of sun light and keep the coconut fiber damp but never wet. How often you need to add nutrient depends on the temperature, plant size and humidity. Herbs and lettuce really grow well in the tray environment, and are happy placed in a sunny window. If you want to grow tomatoes, the author suggests that you try miniature or patio tomatoes. To see some examples of no-energy hydroponics, you can visit the authors web site at http://www.crescenthydroponics.com.

Hydroponic Gardens Are Great For Apartments

By Allison Agnock

Perhaps you love to garden but are frustrated because you live in one of the upper floors of a high-rise apartment building. The biggest hurdle to overcome is the fact that you have no soil in which to grow plants, and lugging bagged soil up to your apartment would be no easy task. There is, however, an easy way to garden in an apartment successfully, and that is through the use of hydroponic gardening. Hydroponics is a method of growing plants without soil. You can start with a small homemade automated hydroponic growing system that can fit on a windowsill, and move up to a larger system if space permits.


Hydroponic Supply

One of the best reasons to consider growing plants in your apartment hydroponically is that this type of system is much easier to get set up than hauling heavy containers and soil up several flights, and the end result is fresh food for your family. To get started with a hydroponic garden in an apartment, you will need to know that there are two basic systems you can choose from: water based and media based. Medium is not soil, but instead could include composted bark, gravel, peat moss, perlite or vermiculite. Also, if you select an active system it will need electronic timers and pumps to make it function well, whereas a passive system doesn't rely on pumps and instead uses a wicking agent for the roots of the plants to access the nutrients.

Because the plants are grown in water, they receive no nutrients from the soil as they ordinarily would. Instead, in hydroponic plant gardening the gardener supplies the plants with nutrients by applying a nutrient solution to the roots via distilled water. The big three nutrients that plants need are nitrogen, phosphorus and potassium. There are other nutrients, called macronutrients and micronutrients, that the plants will need as well and will need to be added to the nutrient solution. Macronutrients are needed in greater amounts, and micronutrients in smaller amounts, but all are needed for plants to thrive.

One of the benefits to growing plants in a hydroponic manner is that they are less bothered from pests and diseases. Many plant pests live in the soil, so when you eliminate the soil you often get rid of the pest's habitat. Hydroponic plant propagation can also be accomplished without using a great deal of pesticides Another reason why this style of gardening is popular is it will produce more food than you could grow in the same amount of soil. You can grow the food in a spot where there is no soil at all, namely, your apartment. So have fun gardening and produce some great-tasting food with hydroponic plant gardening.

The Educational Benefits Of School Greenhouses

By Ann Marier

When people think of a greenhouse, they usually imagine large greenhouses run by commercial nurseries. But there are greenhouses that are operated by home vegetable growers, hobby gardeners, and there are even school greenhouses. If you haven't seen one, school greenhouses are a novel way to enhance education. However, the benefits must be weighed against practical concerns. For educators looking to add an alternative to traditional education, there are some benefits to school greenhouses.


Hydroponics Guide

Learning With Participation
One of the things that make greenhouses a big winner for learning is that they offer a hands-on learning experience. Kids learn about the life cycle and the stages of plants by helping to make them grow and by using school greenhouses in practical experiments. It's one thing to see a picture of a plant in a textbook, but it's a different experience to be able to examine a real plant up close and learn about the parts of a flower, about how pollination works, or to examine leaves. If you have hydroponics in your greenhouse, kids get to see root systems while you explain how they work. For those who learn best with hands-on experience, school greenhouses can greatly enhance the learning process.

Fun For The School Community
In addition to the educational benefits, school greenhouses give new opportunities for extracurricular activities as well as something to brag about in the school newsletter. A gardening club that meets before or after school might give kids a way to start a lifelong hobby of gardening, learning to grow flowers, fruits and vegetables. And the results can be showpieces in school events, such as open houses.

The Cost
Of course, the thing about school greenhouses is that you need to budget for them. School greenhouses can cost anywhere from a few hundred to a few thousand dollars to build, and that's not counting further maintenance costs. In order to install these at your school, you will need to convince the school board that it's worth the budget.

One thing that you'll need to factor in the design of school greenhouses, and ultimately the cost, is the climate you live in and how you will structure the use of the greenhouse through the school year. For instance, school greenhouses in Florida may not need much equipment to operate, even in the winter, while one in Vermont would likely still need to have additional heating equipment installed if you intend to use it throughout the entire school year. Still, despite the cost and trouble of working out the logistics of installing school greenhouses, they can add an exciting new activity for educational environments at all levels.

Author
Ann Marier a prolific writer has written many informative articles about house and garden Topics. Her latest articles are all about binoculars including the popular digital camera binoculars
http://www.digitalcamera-binoculars.com/
http://u-can-prevent-id-theft.com/
http://www.4houseandgarden.com/

Growing Fruits Using Hydroponics

By Allison Agnock

Would you like to try growing your own fresh fruits year round, but live in an area where, due to cold temperatures, snow or poor soil, you are unable to do so outdoors? Instead, why not try hydroponics, a form of gardening in which you can grow plants without any soil at all. There are several different types of fruits you could consider growing in a hydroponic manner.


Hydroponics Guide

One aspect of plant culture that is wise to keep in mind is to pay attention to the growing conditions a particular plant needs to survive and thrive. Poor choices for hydroponic-style gardening are succulents, because they will only thrive in dry conditions, and you are attempting to grow plants in the medium of water. Water-loving plants make a good choice for hydroponic gardening, because the plants will be growing in water. Melons are a good example of a fruit that grows well in this circumstance. Watermelons and cantaloupe can both be grown successfully hydroponically because both are water loving plants and can thrive in this sort of growing medium.

Although not considered a fruit by some, nevertheless tomatoes meet the scientific criteria for classification as a fruit. Tomatoes grow wonderfully in a hydroponic environment as long as they have excellent lighting.

Other fruits that grow well hydroponically are berries. You can grow strawberries, blueberries, blackberries and raspberries very well in a hydroponics system.

Grapes are another favorite fruit that you can grow using this method as well. Both table grapes and wine grapes have been successfully grown using hydroponic methods.

Surprisingly, there are some trees that can be grown in a hydroponic manner. Banana trees are one, and dwarf citrus trees, such as lemons, are another. Imagine growing fruits that would normally require a tropical or very warm climate to produce fruit during an Alaskan or Scandinavian winter, through the appropriate use of a hydroponic plant system and the correct lighting and proper nutrition.

All plants will receive absolutely no nutrients from soil, since this system uses none, so the gardener must supply the plants with nutrients in the form of a nutrient solution. You water the plant with the nutrient, and the plant takes the food up through its roots. Typically the nutrients are dissolved in distilled water, because the water needs to be very pure. If you use your own water, you will likely want to have the water tested for elements that may already be present, so that you do not provide too much of any one nutrient.

Hydroponic-system gardening is an excellent way to increase fruit yields over conventional soil gardening, and it allows gardeners to grow fruits that would otherwise not be possible in their climate or soil.

Major Categories of Hydroponics Gardening

By Allan Wilson

This is an attempt to explain basic types or categories of Hydroponics Gardening. Hydroponics is a method where gardiners grow plants without soil. It doesn’t mean that it does not need soil. Different mediums are used instead of more soil to grow plants. The nutrients are mixed with water and provide all requirements to the plants.

There are some strong points of the Hydroponics Gardening that give you confidence and wonderful results. Plants grow faster with healthy life. This system needs less labor, time, and investment and gives more benefits. This is a more simpler, easier and cleaner method of gardening or farming. It keeps consistency in results. Therefore a large number of people are now using this system.

Hydroponics gardening includes different types of gardening methods. They are divided in terms of the water supplying around plants roots. Generally, two major categories are considered i.e. Passive (hydroculture) gardening, and an Active (hydroponic) gardening.
Active Gardening:A pump is used to circulate the water to plants in the active gardens. It catches water from reservoir supplies to the plants.

The Trickle Garden System:In the trickle gardening system an air pump is used to supply the water to the plants. It catches water from the reservoirs and provides to the plants. A flexible pipe is used to pass water and air simultaneously to the plants. This is one of the best active gardening systems and popular in many countries. It is available in different sizes and shapes. They provide excellent mixture of water and air to the plants and gives good better result than other systems.

The Ebb and Flow Method:This system is also known as the Flood and Drain System. It is oldest method. Now, it is molded and modernized. A mechanical water pump is used to supply water to the plants. A timer is attached to the pump so that could control the pump during water supply.

The water pump automatically turned on by the timer and it will flood the medium for specific time. And it will be turned off to drain water back into reservoirs. This automatic on and off action provides enough air to the mediums when level of water drops. The action can be repeated many times during a day. Therefore this system requires large reservoir systems.

Growing Orchids in a Hydroponic Garden

By Nigel Howell

How long have you been growing orchids for? If you are anything like me you would have fallen in love with growing orchids. But have you ever considered setting up your own hydroponic garden? Well, you may be surprised to know that it is a lot easy than you think and it can help you with your orchid care.

Let me start by explaining a little about hydroponic gardens. To put it simply, hydroponics is the process of growing plants without soil. Instead of soil or compost, the roots of the orchids are placed in a mineral nutrient solution.


Hydroponic Book

Hydroponic systems have become very popular in recent years, not just for orchids but all plants in general. There are many advantages associated with growing plants/crops in a hydroponic system. These advantages are beneficial especially to commercial farmers where their livelihood depends on the success of a crop yield.

The soilless nature of hydroponics means that soil borne diseases are no longer an issue. How many times have one of your orchids developed a disease which originated in the soil and infected many orchids before you realised? This will not happen in your hydroponic garden which means there is less need for pesticides.

Not only do you not have to purchase any soil, you will no longer need to perform possibly the worst part of orchid care – weeding. Due to its nature, hydroponics removes this mundane task from your schedule.

As you will be aware, over watering an orchid is a very common mistake. Your hydroponic system will allow you to set up the correct watering schedule. You will also prevent waste by not watering weeds.

You can set up a hydroponic system almost anywhere. This means that if you have very little space you will still be able to set up your own garden. It also means that your climate will have less of an influence so you could try orchids which would never grow in ‘your’ type of soil.

Do you ever have problems getting your enough light to your orchids? Well, with a hydroponic system more of your orchid is exposed to light. As more of the orchid is visible, especially the roots, it becomes easier to make a quick diagnosis of any problems which will prevent disease from spreading.

Due to advances in science we now know the nutrients which ideally suit the orchid. This means that our orchids get everything they need to grow in the right quantities. So if you set your hydroponic garden up correctly, all your care will result in you growing beautiful orchids.

Hydroponic Gardening Information - 10 Benefits of Hydroponic Gardening

By Debra Proctor

Due to the huge success of this unique and fun method of gardening, there are now over 100 hydroponic gardening centers in the United States and that figure is continuing to grow. Exactly what is so great about this type of gardening and what are its benefits? Here are the top 10 benefits:


Hydroponics Guide


  • The problem of over and under-watering is eliminated. For those of you who continually rot the roots of your plants by over-watering or have plants that are gasping for a drink – this is great news! Okay, mine are the plants that are gasping for water.
  • No soil is needed. This is a Godsend for those of us who happen to have absolutely terrible dirt. With hydroponics, you can have a garden that produces bumper crops without the expense of amending the soil or having large quantities of soil brought in. On a much larger scale, this makes hydroponics great for locations such as Antarctica, atolls, deserts, and even one day - space stations.
  • Soil borne diseases are eliminated due to the fact that there is no soil to harbor diseases.
  • The use of pesticides is decreased greatly because of the soilless growing conditions.
  • The cost of producing produce with hydroponics is estimated to be 20% less than using traditional growing conditions.
  • The plants grown hydroponically receive a higher degree of nutrition and more balanced nutrition while taking up less growing space and using less energy.
  • Fertilization is much easier due to using simple timers that pump the nutrients to the plant root system at regular intervals.
  • Maintenance of the plants is very easy. The gardener’s labor is cut down greatly because once the system is set up, it pretty much maintains itself. Weeds are practically eliminated. No daily weeding or dragging the water hose to the garden.
  • Plants can be grown practically anywhere. Space is needed for the pots and with a grow light, you can even produce a crop in your garage. You no longer need room for a huge garden plot that needs a certain amount of direct sunlight each day.
  • Higher yield of produce. Less space, less work, better results. Hmmmm…..

The list of benefits to hydroponic gardening is extensive and I could go on and on. With more hydroponic gardening information available than ever before and with benefits like these, no wonder it is becoming increasingly popular.

What Is Grodan Stonewool

By Jay Korelitz

Mineral wool is used for its ability to hold large quantities of water and at the same time maintain a high percentage of air as well. This aids root growth and nutrient uptake. The fibrous nature of mineral wool also provides a good mechanical structure to hold the plant stable. Mineral wool has a high pH, which is unsuitable to plant growth. This requires correcting or conditioning. Conditioned mineral wool has a stable pH over long periods of time.


Hydroponics Guide

Stone wool is the main reason that most of the worlds greenhouse vegetables are now grown hydroponically. At full saturation, Grodan holds 80-90% of its volume in water. It is wrapped in biodegradable plastic and the stonewool can be re-used in your garden to improve the aeration and water holding capacity. Grodan stonewool went into space on Challenger in 1986 and is still being used in NASA's testing with hydroponics. You will find Grodan stonewool in some garden centers and in virtually all hydroponics shops in North America.

It is back to Nature. The raw material is basalt rocks and chalk. These are melted at 1600 C°. The lava is blown into a spinning chamber, which pulls the lava into fibers, much like 'cotton candy'. When Mother nature makes this wool we call it 'angel hair'. If you have ever visited a volcano, you may have seen the fluffy angel hair flying around.

The fibers are packed together into a mat and cut Grodan slabs & cubes from it. The stonewool granulate is bags with little flocks of 'angel hair'.

In this day and age we are all much more aware of the importance of protecting our environment. What many do not know is that growing hydroponically is far better for the environment than traditional growing methods;

You have the choice of recycling the water you drain, instead of leaching fertilizer into the ground.

Starting with a pathogen-free product, you have less disease problems and thus use far less pesticides (90% less).

Fertilizer is used only in half strength and overall a commercial grower uses only 25% of the amount of fertilizer normally required for the same crop grown in soil.

Rockwool is produced in blocks ranging in size from 1.5"x1.5"x1.5" to 6"x6"x6" and every size in between and in slabs 3 foot long x 6" wide.

Important facts about Grodan Stonewool:

* Grodan stonewool was developed in Denmark in the early 1970's. The process makes excellent use of nature resources; 37 cu.ft. of wool can be produced from 1 cu. ft. of rocks. * Today most Grodan is pro-duced from recycled Grodan. * Grodan stonewool is the main reason that most of the worlds greenhouse vegetables are now grown hydroponically. * At full saturation, Grodan holds 80-90% of its volume in water. It is wrapped in biodegradable plastic and the stonewool can be re-used in your garden to improve the aeration and water holding capacity. * Grodan stonewool went into space on Challenger in 1986 and is still being used in NASA's testing with hydroponics. * You will also find Grodan products at the EPCOT center / Walt Disney in Florida

The fibres themselves are excellent conductors of heat, but they package air so well, that when pressed into rolls and sheets, rockwool makes for an excellent and reliable insulator. Batts, sheets and roll made of rockwool are a poor conductor of heat and sound. Fire resistive properties for mineral wools is given here in descending order:

  1. fibreglass,
  2. stone wool,
  3. ceramic fibres.

No conventional building materials, including mineral wool are immune to the effects of fire of sufficient duration or intensity. However, each of the aforementioned three wools make common components in passive fire protection systems, such as in spray fireproofing, stud cavities in drywall assemblies required to have a fire-resistance rating, packing materials in firestops and more.

Mineral wools are unattractive to rodents but will provide a structure for bacterial growth if allowed to become wet.

Other uses are in resin bonded panels, growth medium in hydroponics, filler in compounds for gaskets, brake pads, in plastics in the automotive industry and as a filtering medium.

Setting Up Your Own NFT Hydroponic System

By Tony Buel

The NFT (Nutrient Film Technique) used to be commonly used among commercial and smaller scale hobbyist or amateur hydroponic growers. Its use has diminished among commercial growers in recent years mainly because new hydroponic techniques exist today that are better suited to large-scale farming.

Amateur hydroponic growers however still use NFT often. It's not that expensive, it's very easy to use, and it can be easily adapted to suit many different plant types.

The NFT is one kind of solution culture in hydroponics. Solution culture hydroponics involves the growing of plants without growth medium and without soil. Many hydroponics growers believe that solution cultures are the only true form of hydroponics. They say that when growers add solid growth mediums, they are adding nutrients to the plants in the same way soil does. NFT on the other hand, treats the plants only with nutrient solutions prepared by the growers and delivered to the plants root system via water.


Hydroponics Guide

NFT Hydroponics Systems work by generating a constant water flow at the plants' root systems which are suspended in a tub. The slow moving water solution is spread out across a flat surface at a depth of approximately 1 to 3 inches. This shallow solution depth is constantly maintained to create a nutrient film over the plant roots.

When setting up your own NFT system you will need a shallow, flat-bottomed tub and a submersion pump which will keep the water flowing over the plant roots. The plants should be placed close together in order to enable the nutrients to more readily cling to the roots. The submersion pump will constantly recycle the water back into the system. And because the water is being constantly recycled, you will need to closely monitor the nutrient levels in the water.

The NFT technique does have a few potential drawbacks which need to be addressed. For example the nutrients necessary for the plants can cause damage to the submersion pump. If the submersion pump fails, or if there is an electrical failure, your plants will not be getting the nutrients they need to survive. A relatively short disruption in the pump can lead to complete failure in your plants.

Nevertheless the NFT Hydroponic System remains a viable method of hydroponic gardening for small scale and indoor gardeners. By closely monitoring the pump and nutrient solution, hydroponic gardening can be made nearly risk free and quite productive!

Hydroponics Uses For The Success Or Failure Of Your Plants

By Jay Korelitz

Hydroponics is useful in two main ways. First, it provides a more controlled environment for plant growth than soil thereby removing many unknowns from experiments. Second, many plant species produce more in less time and sometimes of higher quality, which under certain economic and environmental conditions, makes hydroponics growing more profitable to the farmer.


Hydroponic Book

With hydroponics there are no soil-borne diseases, weeds to pull, or soil to till, and plants can be placed very close to one another. This allows a large amount of food to be produced in a small amount of space. Hydroponics is also very water-efficient as it uses containers or closed loop systems for the recirculation of water, and therefore requires only a small fraction of the water used in traditional farming.

These qualities combine to make hydroponics useful wherever people wish to grow plants in a non-traditional manner. Science fiction writers have long speculated that hydroponics would allow space stations or spaceships to grow their own food. The same qualities make hydroponics ideal for those who wish to grow plants with maximum control over conditions, and maximum density.

The environment, or climate, in which your plants are grown, is one of the most important factors affecting your end results. The temperature and humidity have to be right for the type of crop you are raising; the lighting has to be of sufficient intensity and duration for the stage your crop has reached. These and many other factors have to be considered before you can hope to grow a healthy and productive crop.

Let's look briefly at the various factors involved. Growing plants indoors means that you have to create similar conditions to those outside. This may seem obvious at first glance, but is it true? Ask yourself what the advantages of Hydroponics gardening are. The outside climate is very varied and does not always work to the plant's advantage. For example a bad storm or a late frost can damage or kill tender young plants.

One of the major advantages of hydroponics gardening is that you can control the climate within the grow room. This means that you can supply your plants with the ideal conditions for their healthy growth, throughout their lives. This ensures a good healthy yield and a bigger profit margin.

Having decided upon which type of hydroponics system to use, you now need to promote the right growing conditions. All healthy plants require a good supply of water and balanced nutrients. They need the right kind of light, for the right period of time, each day. Your plants will need some kind of support for their structure, especially as they mature and grow heavy with harvestable produce. Like outdoor plants they also need the temperature to be within a certain range. Too cold and your plants will not thrive, but remain poor stunted things. Too hot and they may well dry out, then their leaves will wither and the plants die.

The addition of Carbon Dioxide gas (CO2) may be advisable to promote Photosynthesis within the green leaves of your plants. Finally some form of clean fresh air circulation is needed to ensure that your crop can breathe. Like you, your plants need Oxygen for life. They breathe it in through their tissues and like you, can become sick if it is dirty or contaminated. So, taking these factors one at a time, how can we create the optimum conditions for our plants?

Firstly water and a good supply of balanced nutrients are essential. Which nutrient to buy and how to use it? This again is a major question to some people. My advice to you would be to go with a nutrient that you can understand and are comfortable using. As you gain experience and confidence you can experiment with other methods and suppliers at will.

Lighting is another key area that seems to cause newcomers a problem. The type of light and the number of daylight hours are determined by the species of plants you are cultivating and their stage of development. Young seedlings and cuttings, for example, need much softer light than do plants about to flower. Equatorial plants will generally need a higher light intensity for a longer period than will plants from the regions where days and growing seasons are short.

HydroWarehouse is a Discount Hydroponics Supply Store . We offer world class customer service with warehouse prices. Our Secure online catalog contains over 1000 hydroponics , hydroponics system , hydroponics equipment and gardening products.

Share

Twitter Delicious Facebook Digg Stumbleupon Favorites More