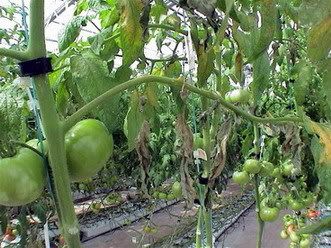
Building your own water works system is quite simple and can be fun, if you know how to follow instructions. This particular type of system is best suited for water loving plants such as lettuce.
Only a few items are required to get you up and running in no time. The things you will need to build a water works hydroponics system are listed below.
Required items
1. External pump
2. Air line/tubing
3. Air stones
4. Water proof bin, bucket, fish tank to use as a reservoir
5. StyroFoam
6. Mesh Pots
7. Growing medium - Rockwool, Grow rocks, et
8. Hydroponics nutrients - (Grow formula, Bloom formula, Supplements, Ph)
Required tools
1. Black spray paint, paint - * Only required if reservoir is transparent
2. Sharp object - Knife, box cutter, scissors (This is not a task for minors - Get help from an adult)
Getting started
1. Find a container to use as a reservoir such as a fish tank or a bin/bucket of some sort. The reservoir should be painted black if it is not light proof. Allowing light to enter the reservoir will promote the growth of algae. It is a good idea to use a reservoir that is the same dimensions (length x width) from top to bottom (Example: Top: 36"x20" Bottom: 36"x20").
If possible, use a fish tank or similar container as your reservoir. Spray paint tank (if translucent) to black and let dry. Using se a knife or sharp object, score a line on the tank (scratch off some paint in a straight line from top to bottom) which will be your water level meter (Allow you to see how much water is in reservoir). Creating this line, however, is not necessary as you can determine how much water is in the reservoir simply by see how far down the floater (StyroFoam) has sunk. Adding the line gives a more accurate and convenient view of the nutrient solution level.
2. Use a tape measure to get the length and width of your reservoir. Measure from inside of the reservoir from one end to the other. Once you have the dimensions, cut the StyroFoam 1/4" (inch) smaller than the size of the reservoir. For example, if your dimensions are 36" in length and 20" in width you should cut the StyroFoam to 35 3/4" x 19 3/4". The StyroFoam should fix nicely, with just enough room to adjust to water level changes.
lf the reservoir tapers off at the bottom (the bottom is smaller in dimension than the top) the floater (StyroFoam) should be 2"-4" smaller than the reservoir, or more if necessary.
3. Do not place StyroFoam in reservoir yet! First, you need to cut the holes for the net pots. Put the net pots on the StyroFoam where you want to place each plant. Using a pen or pencil, trace around the bottom of the net pots. Use a sharp tool such as a knife or box cutter to follow the trace lines and cut the holes for pots. (KIDS!!! Get help from an adult). On one end of the StyroFoam (any end), cut a small hole for the air line to run into the reservoir.
4. The amount of plants you can grow will depend on the size of the garden you build and the types of crops you grow. Remember to space plants appropriately so the each receive ample amounts of light.
5. The pump you choose must be strong enough to provide enough oxygen to sustain plants. Ask for a help choosing a pump at your local hydroponics supply store. Telling them the size of your reservoir (In gallons - 2, 5, 10 gallons, et) and they should be able to make a recommendation.
Connect the air line to the pump and attach the air stone to the free end. The air line should be long enough to travel from the pump into the bottom of the reservoir or at least float in the middle some where so the oxygen bubbles can get to the roots. It also must be the right size for the pump you choose. Most pumps will come with the correct size air line. To make your best guest, use a one gallon bucked/bottle or any container that you know the capacity and fill the reservoir. Remember to count how much it takes to fill the reservoir and you will know the capacity of your reservoir.
Setting it up
a. Fill reservoir with nutrient solution
b. Place the StyroFoam in tank
c. Run the air line through the designated hole/notch.
d. Fill the net pots with growing medium and place one plant in each pot.
e. Put the net pots into the designated holes in StyroFoam.
f. Turn on/plug-in pump and start growing with your fully functional, homemade hydroponics system.
Artifical lighting
If your hydroponics system is for indoor use, you will need to provide artificial lighting for plants to thrive. The size of your garden will determine how much light fixtures and watts you will need for proper coverage. Lighting stores can provide more information on selecting lights. When plants are in growth phase, they benefit more from HID (High Intensity Discharge) lamps. In Bloom, HPS (High Pressure Sodium) increases yield and grow denser, heavier flowers.
Fluorescent light is also an option. However, fluorescent lamps does not offer the same amount of lumens as HID's or HPS lamps. Fluorescent are good for starters and seedlings and for growers with ventilation problems. Fluorescent also burns much cooler than HID's and HPS lamps allowing you to place plants closer to the light source without burning tender foliage.
Footnotes:
A homemade hydroponics system like this is not ideal for a large scale production or commercial usage. This particular system plan does not offer a way to conveniently change nutrient solution. An extra container would be required to hold the floater while you change the solution.
By Kirk_Gordoj
Homemade Hydroponics System Plan
8:20 AM
ThanateTan


